
Most of what we see and read about the Delphix Dynamic Data Platform talks about how we can move data around the enterprise and cloud rapidly and securely. A key value driver of the product is the test data management (TDM) capabilities unsurpassed by anything else in the market right now – the ability to provide data fast, secure and everywhere. And a key component that always impresses the students I teach on my Delphix training courses is the self-service features. Handing off control of data to the consumer (the developer, tester, qa’er, data analyst) is a huge paradigm shift from what we’ve been laboriously doing for decades.
It’s not until you drill down further into the features that you begin to realise the many use cases the Dynamic Data Platform can address and often these are what I class as added benefits in addition to the key marketed features. What I mean by that is you may not implement the product based purely on that use case but now you have it you may as well take full advantage of it. The return on investment grows far greater than originally forecast (and the ROI on Delphix is pretty impressive anyway).
As I said, we talk mainly about data but what about the application itself? Development and testing, especially in todays devops world is fast paced and access to up-to-date and relevant data is key. But obviously we also need to work with the application code and often, backwards and forwards on many iterations of the application depending on priorities, resource availability, schedules as so on.
Delphix has a concept of the data pod. What is a data pod?
A data pod is a set of virtual data environments and controls built by the Delphix Dynamic Data Platform and delivered to users for self-service data consumption
Again, it all points towards data but in actual fact a data pod can contain the application too. So we can have all the TDM capability goodness with our application code as well as data. Rapid lightweight provisioning, bookmarking, branching, rewinding, sharing to name a few.
Lets dig in to this and see how it fits together and look at some of the main benefits.
I’m going to use a test rig I’ve used previously for client demonstrations and it includes a source (production) server containing both the database and application. Obviously in the real world these would be separated but absolutely fine for a demo. I then have a target (development) server where I will provision a data pod containing a copy of the production database and application. We’ll then run through a couple of data operations so you can see just how powerful and simplistic manipulation of the data pod can be.
The Test Rig
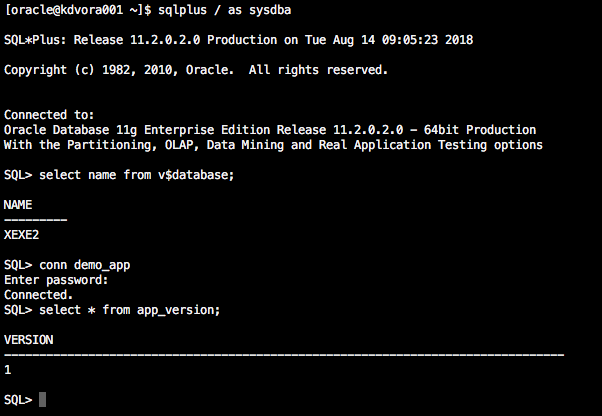
So here we have our source database (Oracle in this case) with a pretend schema called demo_app and a table called app_version.
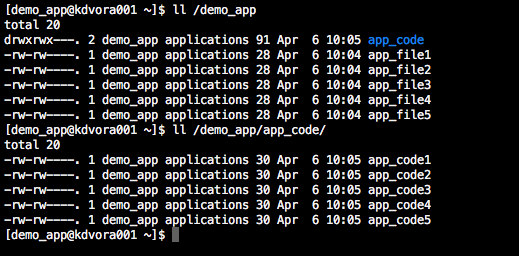
And our source application owned by o/s account demo_app. It’s just a bunch of files and a subdirectory with another bunch of files. Perfectly adequate for our demo here.
We are going to assume in our scenario that the database is already onboarded into Delphix and VDBs are being provisioned but now we want to add the application to the mix. I am assuming you know how to create dSources and VDBs for databases.
The process now is very similar to database virtualisation – we will create a dSource, which will be the demo_app file system and then provision vFiles instead of VDBs. For this demo we don’t need to add another environment to Delphix because we are using the same source server for both the db and app. The only gotcha here is we need to ensure the account we use in the environment config has the permissions to read the app file system. These finer details are all in the docs.
Define Dataset
The first step is to add the app file system as a Dataset Home in the environment configuration.
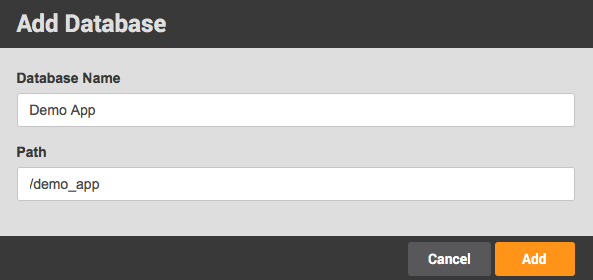
I’m using Delphix version 5.2.3.1 and we have a misnomer in the GUI here where the screen is named Add Database and asks for a Database Name. Slightly confusing. I would prefer it to say Add Fileset and Fileset Name or something similar.
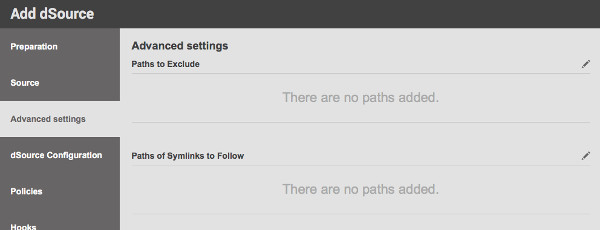
Add dSource
Now we have the fileset defined we can go ahead and add it as a dSource. I’m not going to show every screen for this process but here’s an important one where we can exclude paths within our fileset. So, for example, if we have a directory for logfiles we can go ahead and exclude that.
The rest of the screens in the Add dSource wizard you will be familiar with. We can define policies and hooks exactly as we would for a database source.
Configure Target
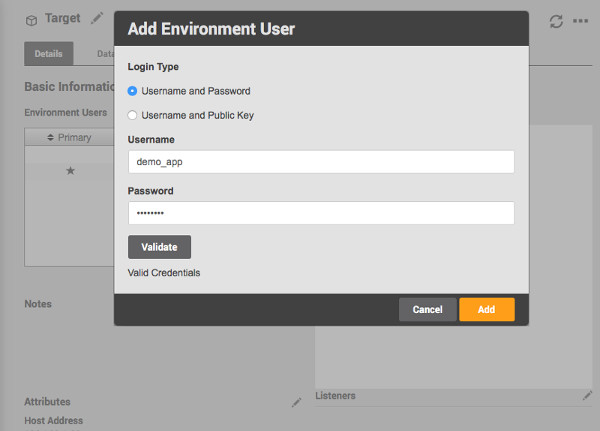
When Delphix provisions the vFiles to the target server the directories and files will be owned by the account we define in the target environment within Delphix. This is important. The developer will access the application files using a server account and that account must have read/write access, therefore we must ensure we use a correctly configure account for the environment.
For this demo, my target server will host the VDB and virtualised application. I already have it configured as an environment in Delphix but only with an account with DBA access for the database. So we need to add another account in the environment configuration, which we will choose during the vFile provision process.
Note: Create the o/s account on the target server first, along with whatever groups you need. This will then be the owner of the application files.
Provision vFiles
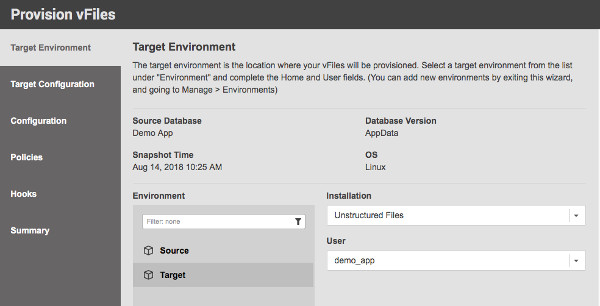
Once we have our dSource available and target environment configured we can go ahead and provision the vFiles in much the same way as a VDB.
The difference here is we choose Unstructured Files as our installation type and the User we added to the target environment.
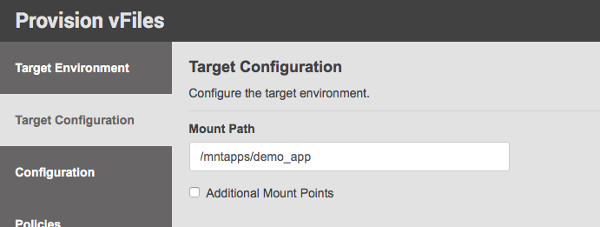
The next important thing we need to take care of is the mount path of our vApp. When we provision a VDB we also provide a mount path but for me this is not too important because we don’t tend to manipulate database files belonging to a VDB directly. We do all our admin through the database or Delphix. In the case of vFiles it is just the opposite so I like to name the mount point something descriptive so it is obvious when we’re browsing the filesystems on the server.
The rest of the wizard will be familiar. Once the provision process is complete we can jump on our target server and see our application files are now available.
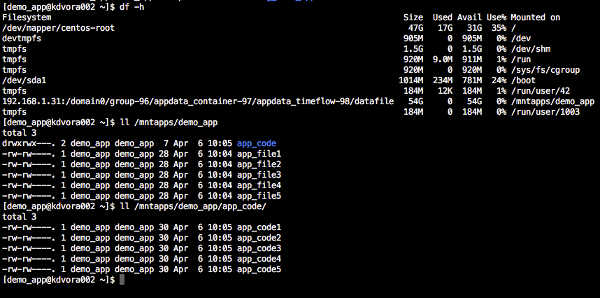
You can see the owner is demo_app and the group is demo_app. Perfect!
Remember, these are not physical files on the server but provisioned from the Delphix engine as virtual files (you can see an NFS mount in the screenshot above). We can work with them exactly as we would with physical files. The real benefits come with what we can do next.
This post is getting screenshot heavy so I’m going to stop this one now and make a part deux where we will configure the Self Service environment and really see the magic of the Dynamic Data Platform in action. Stay tuned!

Matt is a technology consultant with over 20 years experience helping organisations around the world achieve data success using proven and emerging technologies. He is the Principal Consultant and Head Trainer at Kuzo Data.
Connect with Matt on LinkedIn.