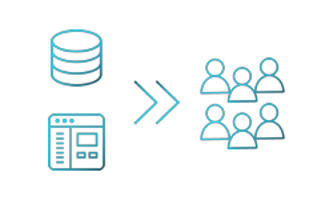
Self service of data is a reality. No more waiting for others to provide data copies to you. No more requests to the DBA team to refresh your analytics environment or set a restore point on your test database and later rewind it when things have gone wrong. No more tickets raised with the middleware team to refresh your development application with a production copy.
I worked as a DBA for many years and one of the most common tasks I had to perform was the movement of data around the organisation. In fact my very first job as a trainee was to refresh the management information system every Monday morning so the decision makers could work with the latest business data that week. It would take me all morning and would mean no MIS available on a Monday AM. When I look back I wonder why it was ok for a key information system to be unavailable for half a day a week. There’s no way it would be like that today but there was no better solution at the time.
Back then my week always began with a walk to the computer room where I would retrieve the DLT (tape backup) that contained the previous nights backup of the source database and load it into a tape drive of the target server. Then back to my office where I would kick off a restore of the tape and wait patiently (by the way, this was all Oracle databases hosted on OpenVMS – I do miss OpenVMS!). The database was only a few GB but it would take over 2 hours to restore! The remaining steps involved deleting the existing target database, recovering the restored database followed by a rename and then handing it over for a quick QA before releasing back to the business. A little laborious to say the least.
Let’s fast forward nearly 20 years and see how the process has changed.
This post follows on nicely from the Virtualise Your Application Alongside Your Data post where I talked about how the Delphix Dynamic Data Platform can just as easily virtualise an application as it can data. Part 1 showed how to setup and provision the virtual application alongside the virtual database, so now we need to configure the Self Service environment to create the Datapod and provide truly self service data to the people that need it.
Once it’s configured we hand it over to the end user where they can perform their own data operations (including refreshes of MIS databases!) and we as DBAs can put our feet up and relax… or in reality, crack on with the backlog of other tasks the boss has assigned to us but we haven’t had time to do because of all the database refreshes the dev team have been demanding twice a week for the last 6 months!
So let’s take a look at how to configure Delphix Self Service and more interestingly what the end user can do with it. As I said in Part 1, this is often what impresses my students and clients the most during classes and demos. You can almost hear the the cogs grinding in their minds as they think through all the uses and benefits their teams can take advantage of. It truly is a game changer for a lot of these teams.
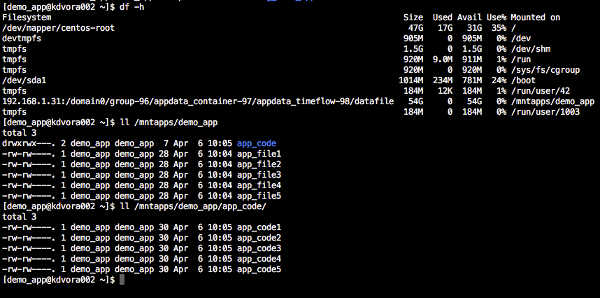
A quick recap. In Part 1 we had our source database already onboarded into the DDP and VDBs provisioned. We ingested our demo application and provisioned the vFiles onto the same target server as the VDB.
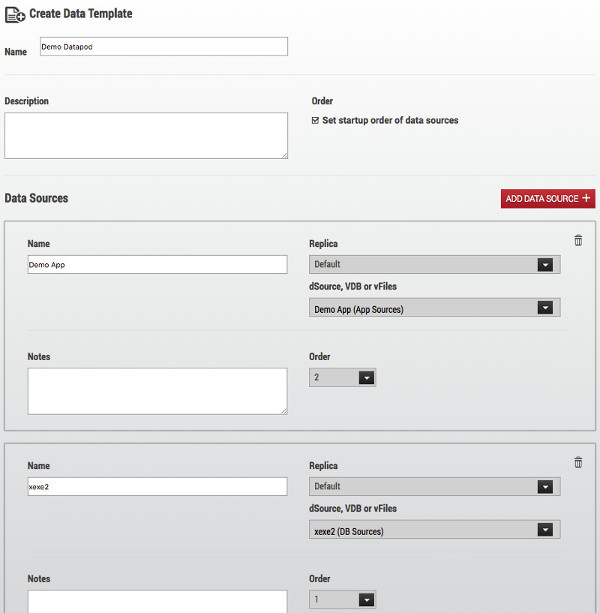
So the next step is to configure Self Service (SS) and setup the Datapod. Configuring SS for vFiles is the same as it is for VDBs and super simple.
Note: we can not add sources to existing SS templates and containers therefore if our VDB is already part of SS we need to delete the container and template it belongs to or create a new VDB to work with.
Firstly we create a template, adding a second data source and configuring the startup order if required – more often than not applications don’t like it when their database is unavailable. I’ve seen many apps that require a complete restart if they lose their connection to the database. Setting the startup order to database first and application second will ensure we don’t hit this issue.
Note: we set the startup order during template creation which is then inherited into the container. You can’t change the container startup order directly.
Once the template is created we create the container. I won’t show that here because it’s almost identical to the template creation.
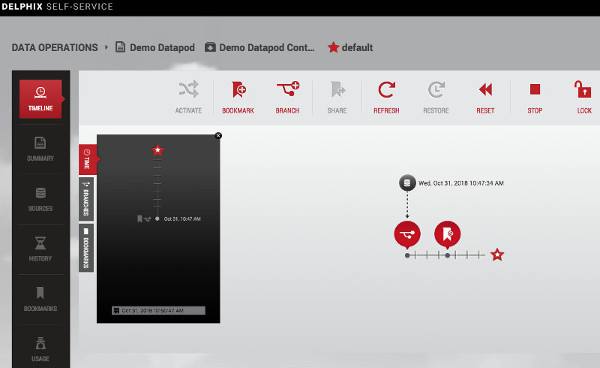
And now we have a Self Service Datapod.
Now let’s take a look at a couple of data operations we can do with our shiny new datapod and see the real tangible benefits to the data consumer.
Simple Rewind
There’s numerous reasons why we may want to restore our data/application to a previous point in time. Let’s say we’re a developer and we’re working on a new application feature but made a mistake. We can easily take a datapod back in time to just before the mistake was made.
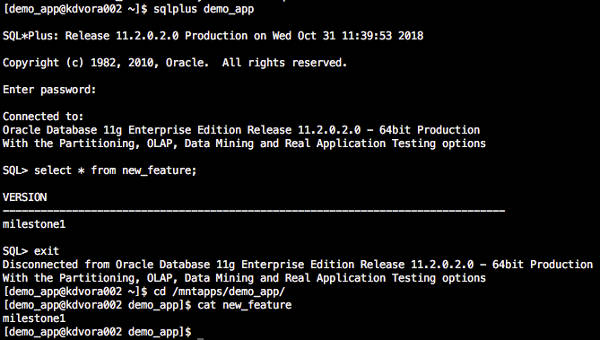
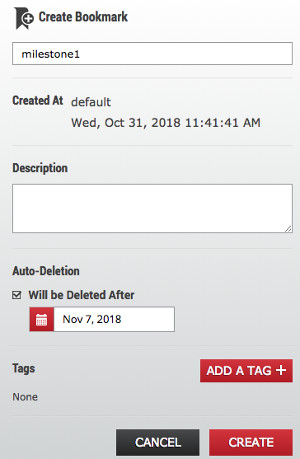
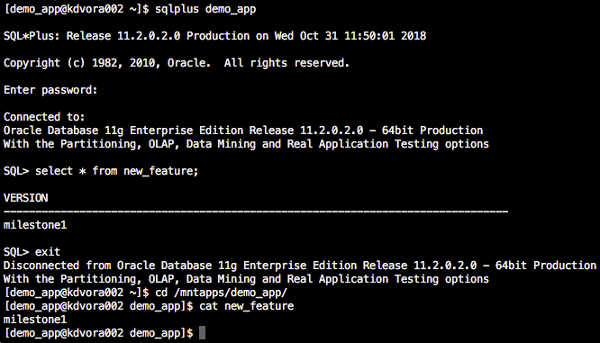
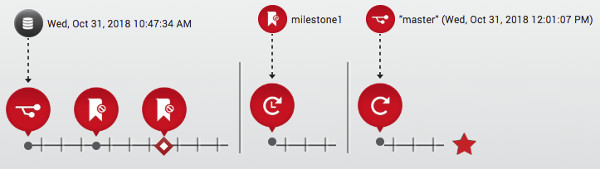
Here we have our database and app files showing our pretend new feature with milestone1. We’re happy with our code at milestone1 so we take a bookmark in SS. This ensures we can always get back to this point in time no matter what the retention period is set to.
We carry on coding and get to milestone2.
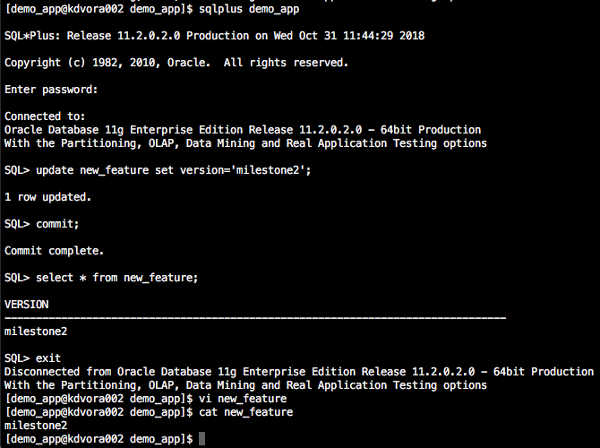
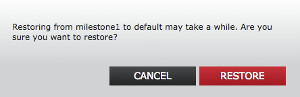
We do some testing where we find we’ve made a big mistake and need to get back to milestone1 where we can recode the mistake. It literally takes 3 clicks of the mouse and in less time than it takes to grab a coffee our datapod is back.
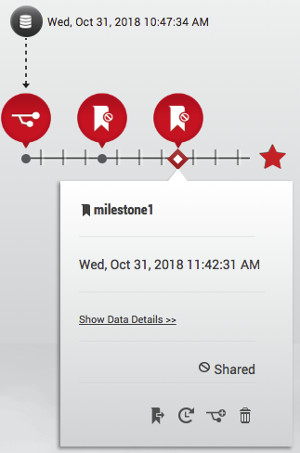
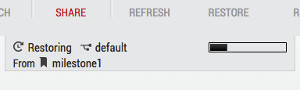
We have our database and app files back to state they were at milestone1.
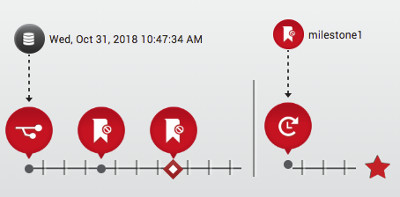
Our timeline in SS now shows the action we just performed.
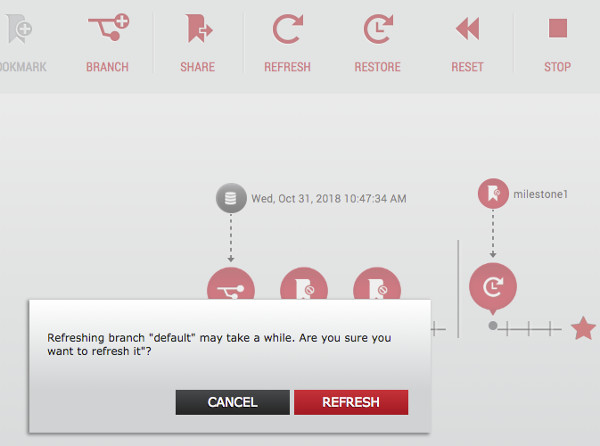
Data Refresh
Refreshing our data, which includes our database and application code is a two click process. A third easier than a restore!
Note: a refresh of the container grabs data from the template sources. Therefore we always have to design our pipeline to best suit our requirements and obviously data masking has to be considered. A template can be a dSource or a VDB so we have lots of flexibility. I’ll talk about pipelines in another post.
Click the refresh button on the horizontal toolbar at the top then again in the pop up window to confirm. A couple of minutes later and our datapod is available again.
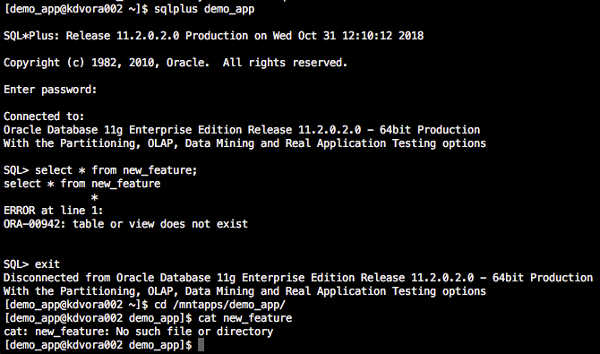
We have a fresh copy of production and our new feature is gone. And not a DBA in sight!
The timeline now shows the bookmark restore and the refresh we’ve just performed. Having this pictorial view of the timeline is very useful. We can quickly see bookmarks and a history of actions taken in our datapod.
There’s various more operations we can perform in Self Service that can unlock some really interesting new and efficient ways of working. The two I’ve described are the most common requests DBAs receive from their end users and so can remove that burden from their day job and increase time efficiencies by orders of magnitude.
To summarise, Delphix Datapods can not only contain database copies but unstructured files too, like application code in my example. Delphix Self Service provides capabilities to the data consumer (developer, tester, data analyst for example) that really is a game changer. The possibilities for new, more efficient ways of working for data consumers are huge.

Matt is a technology consultant with over 20 years experience helping organisations around the world achieve data success using proven and emerging technologies. He is the Principal Consultant and Head Trainer at Kuzo Data.
Connect with Matt on LinkedIn.